Friday, November 9, 2012

Guest/Kids Bathroom Remodel...started

I finally had enough!  Enough of towels being tossed on the floor willy nilly!!!


Ignore the unmade bed...this is my 6 year old's  bed.  I am lucky that the drawers are all closed {well mostly}.

So, that led to this...

Ummm, yeah. 

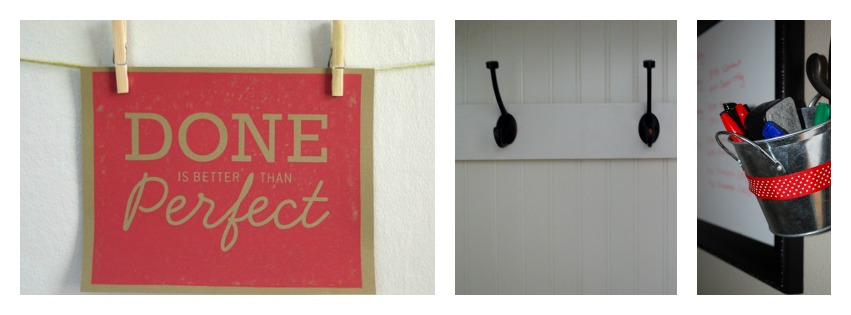
I just wanted to originally add three hooks (one for each kid) in the bathroom.  But just taking down the one towel bar {that was oh so useful!}  and adding the hooks isn't any fun.  Am, I right??  I mean, come on!

Board and batten behind those hooks would look sooooo much better, right?!?  And then of course, if I am putting up board and batten the builder grade mirror needed to be framed out.  And because my walls have texture, I decided to skim coat them smooth to make the board and batten look more realistic.  Yeah, I could have just painted the wall white, and I actually did in our kitchen eating area where I added board and batten, but the texture has always bugged me.  So, now I have a dusty mess.


And it may be weeks before the hooks actually make it up on the wall.  But I am loving the look already!


I think it will be a big change from this...
 
 
Can't wait :)

But, I have run into one problem that I would love some advice on.  I didn't buy enough 1x4's and had to put two pieces together to make the left side frame of the mirror.  So far, they are just dry fitted in and I can caulk them when they are up.  I am just trying to decide if it is noticeable or not.  I hate to go buy more wood and wait for it to be primed and painted...hey, I am impatient!  But, I don't want it to look wrong either.  So, let me know what you think!!

Look close (it didn't photograph well).  Just about at the base of the medicine cabinet it where the two pieces of wood meet. 

 
I do like how the moulding on the top part of the frame is turning out though!!  Yes.
 
A work in progress....All over some wet towels on the floor.  Ooops!

Linking up to:

Thursday, October 25, 2012

Candy Corn!!

I LOVE candy corn!  I become crazy excited when I see it in the stores.  Unfortunately for my waistline, I can eat my weight in it...daily :(

So, to save myself from unwanted pounds...I decided to make some cute decorative ones this year. 


I had some 2 x 4's left over from my Laundry Room Bench and after searching for ideas on Pinterest, I knew I could create something cute!  And quickly!  This project was completed in under two hours, including paint drying time...YAY.

I just kid of eyeballed the shape and size I wanted.  My miter saw was perfect for quick cuts.  My daughter was off of school and wanted to get in on the painting fun.  She did most of the painting for me!  Thanks girlie!!


I distressed them with sandpaper and added a little stain.  Just to bump up the cuteness factor :0


And I even had enough wood left over to make a little pumpkin to go with them.  I made the stem out of a leftover cut.
  I think they turned out really cute and I love how they look on my buffet!!


Cuteness!!!!

Linking Up With:
 

Tuesday, October 16, 2012

Halloween Entry

My kids always want me to decorate SPOOKY for Halloween.  I am more into the cute items.  So for our entry way this year...I went a little spooky and a little cute.  The kids of course think it should be spookier.  But I LOVE IT!!


Using my craft cutter I made the bats on the wall and the "boo" for the glass candle holder.  The lamp is draped with cheese cloth that I sprayed black with basic flat black spray paint.  I picked up the trick or treat sign at a craft show this weekend for $6 and everything else, I had on hand.
 
I made the pumpkin print too.  It is cut from glittered paper and just framed in a cheap black frame from the dollar store.  I hot glued the orange ribbon to the edge to hide the cheap quality of the frame.
 
 
Love it!!
 
 
 Linking to:

Monday, October 8, 2012

Little Changes

Builder grade white appliances.  Ugh.  I don't like them very much.  Little by little we have been changing them out for stainless (when the budget allows).  Our range hood was one of those white appliances that I wanted to change.  I would love to have a microwave/hood combo, but I can't find one to fit the space.  Our cabinets over the stove are a one piece unit, and the center cabinet isn't very high.  So a microwave would be VERY low.

But I didn't want to purchase a stainless steel hood.  Just too pricey for what you get (in my opinion).  But I knew I could update the one we had.

Gotta love spray paint!!


I figured for the cost of a can of spray paint ($4.98) I could make the range hood match the other appliances and not be such an eye sore.
 
 
I took disconnected and took down the hood.


I taped off the electrical, exhaust fan, and the stickers (with all the legal/code/electrical stuff) so that wouldn't get covered with paint.


A couple of coats and it was looking pretty good.
 

 MUCH BETTER!!
 
A little Before and After.
 
No, it's not a huge difference but I love it!
 
I didn't prime before painting, so I hope that it will hold up well to cleaning.  We'll see.
 
Linking up with...


Tuesday, September 25, 2012

Pretty little buffet

Score! 

I have been looking for a small buffet for my little dining room for a while now.  I have scoured the flea markets, junk shops, ebay, antique stores...you name it.  Why no furniture stores you ask??  Because I am cheap love a bargain!  And I wanted something with a little character.

After months of searching I came across this little beauty on Craigslist..


I was totally in LOVE with the barley twist legs on the base and the posts on the upper piece, the pearl bead moulding in a diamond pattern on the doors and the old mirror on the top were just extra special.  I, however, was NOT loving the cheap black latex paint someone slopped on her or the cheap silver knobs. 

But with a little elbow grease and a ton of stripper, I knew I could bring her back to her former glory.

So the long painful slow process of restoring her began.  [Why a "her"??  Just look at those legs...pure beauty.]

 First I had to clean out all the years of dirt and grime.  She didn't smell very good after years of sitting in the garage of the guy's house that I bought her from.  A little Murphy's Oil Soap and warm water got her all cleaned up and smelling great! 
I taped off the mirror and put on a heavy layer of paint stripper!  Yuck!!!

Looking better already!

A little before and after all in one piece.


Look at those GORGEOUS barley twist legs...and the feet!!  I could die!

She is looking so good.  LOVE!!!!


I still need to find some knobs or pulls, but I am so excited with how she turned out!  So pretty!!!  Don't ya think?

Oh and she needs some better accessorizing and the dining room needs to be repainted.  But one thing at a time.  For now, this is one project that is FINISHED!

Linking to:


Saturday, September 8, 2012

LET THERE BE LIGHT!!

My south facing house is dark.  VERY Dark!

We have covered porches on the front and back of the house, so direct sunlight is very hard to come by.  And I had originally decorated with dark colors.  I love chocolate brown and deep red.  So, any and all natural light was being sucked up by our dark paint colors.


I had tested out a lighter color on the right of the office doors...still in the brown family, just much lighter.


See...ummm.  Way.  Too.  Dark.

So, I got a can of paint and my trusty paint roller.  And ta da!!!


The first dark pictures were taken during the middle of the day and these updated lighter pics were taken at 9 p.m.!!  And notice how much brighter the room is! 
 
It is crazy how much more light there seems to be in the other rooms of the house too, just by painting the entry way.  Who knew??? Certainly not me!  Or I would have done it sooner.
 
I can't wait to continue to lighten and brighten other areas of the house.  Add moulding to the dining room entry seen in the pic above.  Change out the light fixture to something a tad. bit. bigger.  And DIY some things to decorate this space.
 
But for now, LET THERE BE LIGHT!